What you'll learn
- The complete capture workflow (Save folder → Target Window → Capture area → Start → Finish)
- What "Target Window" and "Action Key" do
- How to hand off captured images to the Image Processing Tool
1Overview
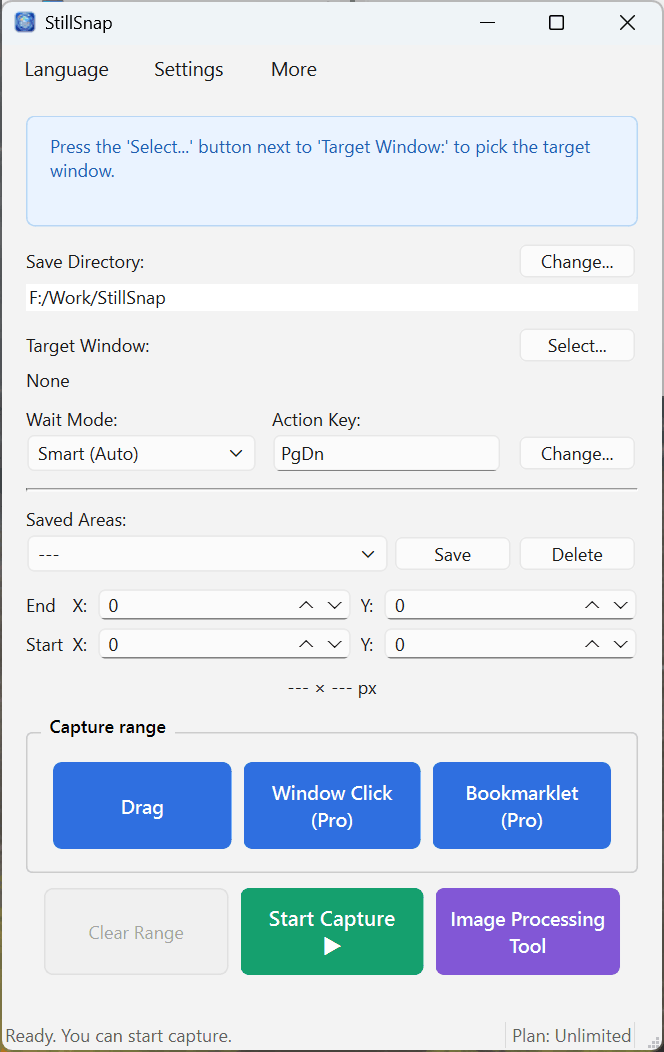
StillSnap works by automatically capturing the screen one page at a time and then batch-processing the saved images (OCR, ePub/PDF creation). A small amount of setup is all it takes — after that, page-turning and capturing proceed automatically.
- Choose a save folder — where captured images will be stored.
- Select the Target Window — the app StillSnap will send page-turn keys to (a browser, viewer, document reader, etc.). Not needed if you are turning pages manually.
- Define the capture area — the region of the screen to capture.
- Start capturing — StillSnap automatically repeats: capture one frame → send the action key → wait for the next page.
- Stop capturing and finish in the Image Processing Tool — run OCR, create ePub, and more.
2Setup — Save Folder and Target Window
Save folder
Click Change… next to Save to: to choose a folder. Capture cannot start until a save folder is set. For full setup instructions, see Getting Started / Setup.
Target Window
The Target Window is the window that StillSnap sends page-turn key presses to during capture. Click Select… next to Target Window:, then click the desired window (browser, viewer, document reader, etc.) to select it. Once selected, the window title is displayed.
- After each captured frame, the Action Key (default: PgDn) is sent to the target window to advance to the next page.
- You can change the Action Key by clicking Change… next to Action Key: (e.g., → or Space, to match the target app's page-turn shortcut).
- If you prefer to turn pages yourself, you do not need to select a Target Window.
3Defining the capture area
Choose which part of the screen to capture as an image. Select one of the three methods under Capture area selection.
- Drag (All plans) — drag on screen to draw the capture area.
- Window Click (Pro and above) — click a window to use its bounds as the capture area.
- Bookmarklet (Pro and above) — uses the browser's page-content area as the capture area.
Once an area is set, the Start X/Y, End X/Y, and --- × --- px fields are updated. Frequently used areas can be saved to Saved Areas and recalled later (saving and recalling areas is Unlimited only). For guidance on choosing between methods, see Three Ways to Define the Capture Area.
4Starting and stopping capture
When you are ready, click Start Capture ▶. The StillSnap window minimizes automatically so it does not appear in your screenshots, and capturing begins.
- If a Target Window is selected, StillSnap automatically repeats the capture → page-turn → wait cycle.
- Use Wait Mode to tune the interval between captures so pages have time to load before the next shot is taken. See Choosing a Wait Mode for details.
- StillSnap stops automatically when it detects the last page has been reached, consecutive duplicate frames, or a browser URL change. Stop conditions are explained in Auto Action and Stop Conditions.
To stop manually, restore the StillSnap window from the taskbar and click Stop ■.
5After capture — finishing up in the Image Processing Tool
Captured images are saved in a per-session folder inside the save folder (e.g., capture_(date-time)), numbered sequentially.
Click Image Processing Tool to open the tool with your captured images already loaded. From there you can run OCR, AI refinement, translation, and ePub/PDF creation. You can also drag and drop existing images directly into the tool.
For a full walkthrough of the Image Processing Tool, see Image Processing Tool Overview.