Three Ways to Set the Capture Area
Drag = All plansWindow Click / Bookmarklet = ProWhat you'll learn
- When to use each of the three capture area methods: Drag, Window Click, and Bookmarklet
- Which plan each method requires (Drag = All plans; others require Pro or above)
- How to save and recall frequently used areas (all plans; save count: Starter 1 / Pro 10 / Unlimited unlimited)
1What is a capture area?
The capture area is the rectangle on screen that StillSnap crops into an image for each page. Once set, this rectangle is used throughout the entire capture session. StillSnap offers three ways to define the capture area so you can choose the best fit for your target content.
| Method | Best for | How it works | Plan |
|---|---|---|---|
| Drag | Any area on screen | Draw a rectangle freely with your mouse. Works with any window or screen content. The most basic method. | All plans |
| Window Click | A single window | Click on a window to snap the capture area to its exact client region. No hand-wobble, perfectly repeatable. | Pro and above |
| Bookmark- let | Browser pages | Uses a browser bookmarklet to send the page viewport to StillSnap as the capture area. Ideal for browser-based capture. | Pro and above |
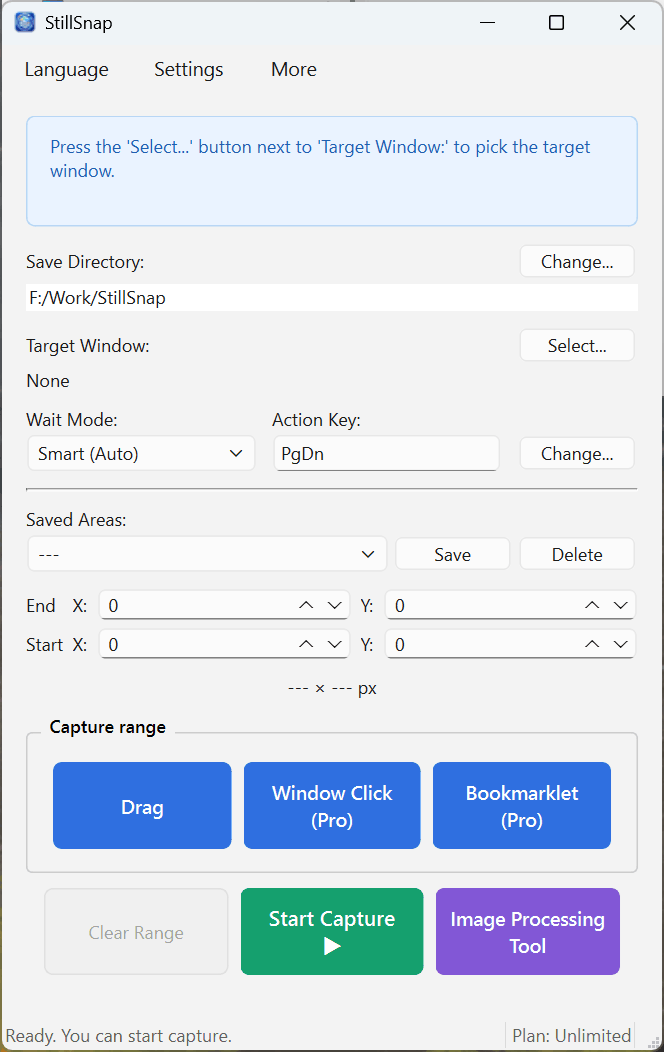
2Drag All plans
The most basic method. Draw a rectangle anywhere on screen with your mouse to define the capture area.
- Click "Drag" under "Capture area selection". The StillSnap window hides temporarily.
- Drag from the top-left to the bottom-right of the area you want to capture, then release to confirm.
- The Start X/Y, End X/Y, and px fields update to reflect the selected area.
3Window Click Pro and above
Just click on a window to set its client region as the capture area. This eliminates the hand-wobble of dragging and gives you the exact same area every time.
- Click "Window Click" under "Capture area selection". The StillSnap window hides temporarily.
- Click on the window you want to capture. Its client region becomes the capture area.
4Bookmarklet Pro and above
Use this method when capturing browser pages. A bookmarklet registered in your browser sends the page viewport to StillSnap as the capture area.
- Click "Bookmarklet" under "Capture area selection". A small local server starts and the setup page opens in your browser.
- Follow the on-screen instructions to register the bookmarklet in your browser. Run it on any page you want to capture, and the capture area updates in StillSnap automatically.
For step-by-step registration instructions, port settings, and troubleshooting, see Bookmarklet (Browser Capture).
5Saving, Recalling, and Clearing Areas
You can save frequently used areas for one-click recall later. Saving, recalling, and deleting saved areas is available on all plans; the number you can save depends on your plan (Starter 1 / Pro 10 / Unlimited unlimited).
- Save — With a capture area set, click "Save" next to Saved Areas: to give it a name and store it.
- Recall — Select a saved area from the Saved Areas: dropdown to load it instantly.
- Delete — Remove an area you no longer need by clicking "Delete".
- Clear Range (All plans) — Click "Clear Range" to deselect the current capture area without affecting saved areas or the Target Window setting.